Zucchini Carrot Potato Pancakes

Growing up potato pancakes were one of my favorite things to eat for dinner, perhaps it was because we always ate them with steak. Can you imagine a time when that was my favorite food? Long long before I became vegetarian. So while my eating tendancies have changed, my love of potato pancakes has not.

Traditionally, and by that I mean in my parents house, we always cut just a little carrot into the pancakes. I don’t know if this was for taste or just to sneak some non potato vegetables into our very picky diets, but it’s a trick that I have never strayed from. These days I think it adds a nice little pop of flavor as well as giving the pancakes a playful color.

This weeks CSA box came with some zucchini and absolutely beautiful Canela potatoes. Canela potatoes are very similar to russets, but about a third of the of the size of those giants you find in the super market. It was going to be a hectic week so I decided to make a huge batch of these to reheat throughout the week when I was too exhausted to cook.

Zuccinni Carrot Potato Pancakes
2 medium Zucchini
5 small Carrots
6 Canela Potatoes (~2 Russets)
1 medium Onion
2 eggs
1/3 cup flour
1 tsp salt
pinch pepper
1/4 cup flavorless oil (I prefer grapeseed, canola always smells fishy to me)

I like to leave the skins on my potatoes, but make sure to give them a good scrubbing if you’re going to do this. Same goes for the carrots and zucchini, I do not peel, only trimming the ends off before grating. Using a box grater, grate the zucchini, carrots, and the onion into a large bowl. Grate the Potatoes onto a kitchen towel and wring or pat dry before adding to the bowl. Whisk the eggs together in a separate bowl, and stir in the salt and pepper. Pour the eggs into the bowl with the grated veggies and mix together. I find it’s easiest to do this with my hands, but it does make quite the mess. Once the eggs are mixed in, add the flour and mix again. This is the part that’s always a little up in the air, depending how moist your veggies are, you may need to add a little more flour, but rarely more 2/3 a cup total. You’re looking to have a very thin egg and flour “paste” on the veggies.

To cook, heat oil in a large skillet, I prefer cast iron above and beyond anything else for this kind of cooking, but whatever you have will do. Once the oil is hot, create you pancakes. Again, I like to make a mess and do this with my hands so I can squeeze out the extra “juice”, but each pancake should be about 1/2 cup. Once you pancakes are in the skillet, flatten them with a spatula and turn the heat down to low. Rotate the pancakes occasionally to ensure they cook evenly. Once the bottoms have browned to you liking, give them a flip and continue cooking for another 10 minutes.

If your making them in batches they stay crisp if you keep them in a low heat oven on a plate, and make a wonderful snack for days to come. I enjoy eating mine with apricot apple sauce, or plain yogurt with a little freshly chopped dill.

Farmers Market Saturdays

It was a beautiful day at the farmers market yesterday, cool but sunny.

While stone fruit was nothing new this week, it was finally sweet enough (and cheap enough) to warrent a few peaches and nectarines. And I’ll admit it, I ate two of them standing over the sink first thing when I got home. Yummmmy!

Interesting cucumbers.

And no trip to the farmers market would be complete without some Adante Dairy cheese, and a mindless veggie lunch.

Mindless veggie lunch generally falls into two categories, leftover magic, or some variety of kale salad. Yesterdays lunch was the former. There is something very gretifying about bringing home a weeks worth of veggies AND clearing out last weeks odd and ends.

I almost always have some kind of cooked grain and bean in my fridge, which is a huge time saver, especially on the bean front, since soaking and cooking can take the better part of a day (or overnight if you’re smart enough to think ahead). Mix those together with almost any combination of veggies and you’re sure to have a decent lunch.

Mindless Lunch 

Farro

black beans

roasted beets

sauteted cucumbers

toasted, copped almonds

scallions

Dressing

olive oil

red wine vinegar

salt and pepper

Indulgent White Chocolate and Macadamia Nut cookies

White Chocolate is not one of my favorite things, in fact, I sort of dislike it, but when it comes to white chocolate and macadamia nut cookies, I make an exception. Perhaps it’s the guilty pleasure of having a mouthful of sugar, who knows. My friend had just returned from Hawaii with a bag of macadamia nuts for me, so I decided it was probably time to pull this recipe off the shelf again and whip up some cookies. Because despite my reservations about white chocolate, the rest of of my house absolutely loves it. So whether you are a white chocolate lover, or skeptic, give these cookies a try, and perhaps you too will come to love them.

White Chocolate Macademia Nut Cookies

  • 1 cup butter, softened (2 sticks)
  • 1 cup sugar
  • 1 cup brown sugar, lightly packed
  • 2 tbls vanilla
  • 2 eggs
  • large pinch of salt
  • 1  1/2  tsp baking soda
  • 2 1/2 cup flour
  • 1 cup white chocolate
  • 1  1/2 cup macadamia nuts, chopped

In the bowl of a stand mixer cream together the butter and two sugars. Reduce the speed of the mixer and add in the eggs and vanilla. In a separate bowl mix the flour, salt and baking soda together. Now slowly incorporate the flour mixture into the rest of the batter. once the dough is of a uniform consistency, add in the chocolate and macadamia nuts. I often opt to mix these in by hand with a wooden spoon.

Cover the dough with saran wrap, and place in the refrigerator while you pre-heat the oven to 375°. When the oven is ready, take the dough out of the fridge and create just smaller than golf ball balls and place them on a parchment paper lined cookie sheet. Bake for 10-12 minutes.

A box full of when will I have time to cook

WOW, the past two weeks have been hectic, between moving and midterms I’ve had absolutely no time to really cook. Last weekend was the big move day, and of course our CSA box arrived just days before. So while all the fruit was eaten, I still have a shiney new refrigerator of slightly wilted veggies. I wasn’t particularly inspired either, I was tired of chard, and pretty sick of broccoli too. Which brings us to… how to use veggies you’re not wild about, part 1:

Continue reading “A box full of when will I have time to cook”

My Love Affair with Chard

Last night I made the great mistake of thinking that it would be a good idea to roast garlic to get the smell of the roommates fish out of the house. While the garlic smelled tantalizingly delicious, it slipped my mind that I’m allergic to garlic. There is nothing better to wake up in the morning with a half swollen throat. eek. I guess this is why I keep children’s benedryl stocked in all my houses. Dinner was a bit of a disaster, I decided to make beet linguine with chard and alfredo sauce, but by the time the kitchen was free, I was so tired and scatterbrained that I completely messed up the sauce. In the end it tasted fine, but was much richer than I had intended it to be. Oh well, live and let learn. The beet pasta came out beautifully though, there really is no substitute for home made pasta.

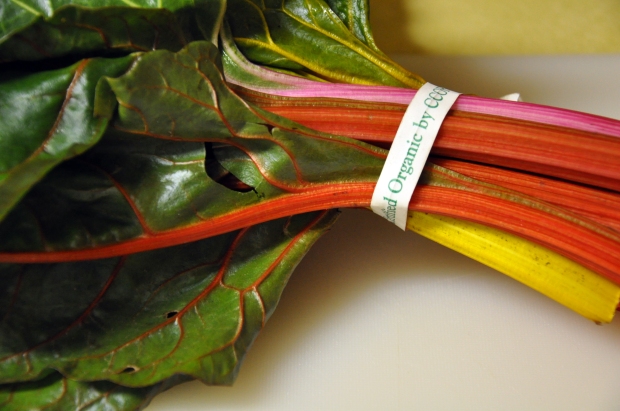
Lately I’ve been on a chard kick, I just can’t get enough of it. I think part of this obsession is that the three days a week I spend at home in Santa Cruz all I do is crave hearty vegetables, and chard seemed to fit the bill for being easy and delicious. Chard has quickly become my go-to vegetable, having been featured in risotto, soup, curry, pasta, quesedillas, and of course, on it’s own.

Tuesdays and Thursdays are my bad days at school, I come home exhausted and hungry. So hungry I generally don’t feel like cooking anything that takes more than 30 minutes to make. This past year it’s been hard for me to muster up the desire to cook anything involved for just myself. It’s hard to cook for one, all that prep work and then you’re either saddled with tons of leftovers, or you just spent 3 hours making a super small portion, and have halves of veggies lying around the fridge. But my struggles of solo cooking are almost at an end, I will be graduating soon and could not be happier.

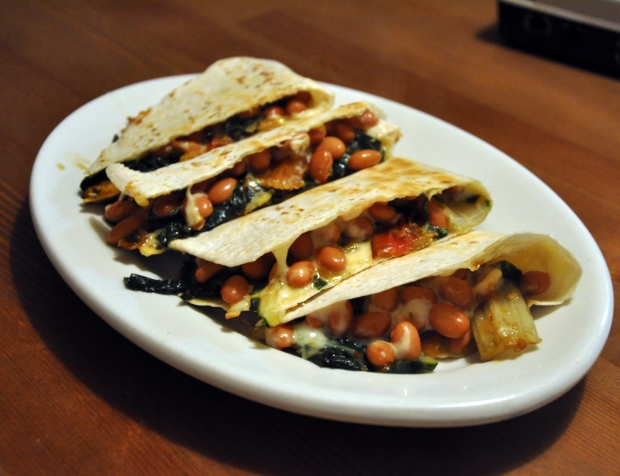
On days when I have no energy to cook, but my body is craving the vegetables, I like to make chard quesedillas. Now, they are super delicious, but inevitably get soggy on the bottom after eating the first piece. I have tired everything to avoid this, and have accepted that if I want to use whole beans and moist chard that there is no way around it. And since those whole bean and chard are what really make this quesedilla pop, I put up with it.

Continue reading “My Love Affair with Chard”

One Sauce to Rule Them All

The search for the perfect tomato sauce, be it for pasta, pizza or anything else is quite daunting. Riddled with guarded family secrets and finding the perfect tomatoes, it’s no wonder that no one can agree on what is the best. I have recently been trying my hand at finding a good complimentary pizza sauce for my homemade pizza craze. In the search I have stumbled over some good and some bad, and some just plain unmemorable sauces. This particular sauce is a hybrid of the recipe my mother taught me for lasagna and meatballs, and some serious experimentation. I have finally landed on something that it’s too overwhelming when combined with whatever vegetables I find to throw on the pie, but can definitely hold it’s own on a margarita pizza.

Continue reading “One Sauce to Rule Them All”

Fakin’ Lettuce and Tomato

Sometimes people ask me what I eat as a vegetarian, and while I’d love to list off all those great leafy greens, and impossible parsnips, the truth is, I cheat sometimes. No, it’s not what you think, the bacon is fake, but the cravings are just as real as any carnivore’s. Every once in awhile, and probably more often than I’ll ever admit, I indulge myself in the most amazing fake BLT ever, complete with mayo and a creamy avocado.

Now I was never really a fan of fake meats, and still find most pretty repulsive. But either the fake meat has improved, or my tastes have changed, probably a a bit of both. This past year I became familiar with a tiny but quite popular sandwich shop in San Francisco that made veggie BLT’s and since then have been on a quest to duplicate and improve.

DIY Veggie BLT

Everyone has their own opinion on sandwich order, and what to include, what not to include, to melt the cheese or slice the lettuce, but here is my version, top to bottom.

  • 1 Sourdough deli roll
  • French Yellow Mustard
  • Sliced Vine Tomatoes
  • Monterrey Jack Cheese
  • Morning Star Fake Bacon
  • Lettuce
  • Sliced Peperchinis
  • Thinly Sliced Red Onion
  • Freshly Ground Black Pepper
  • Sliced Avocado (then smashed a little)
  • Mayo

I like to load up the mustard to the cheese and then stick the roll in the toaster oven on broil to melt the cheese (and heat the tomatoes that normally live in the refrigerator. Cold tomatoes freak me out). After the cheese has just started to melt I throw the rest of the fixings on and then slice in half. I have found that it can get pretty messy, so it’s a good idea to wrap this sandwich up before trying to consume.

Ginger, Take Two

After a rather disappointing attempt at which can only be called the pumpkin ginger bread disaster of ’09 I have finally succeeded in fulfilling my ginger cravings with the best ginger cookies I’ve ever made (okay, the only ginger cookies I’ve ever made). And since then have made two batches to give away to others.

Chewy Ginger Cookies (originally from chow.com ) makes 3 dozen

2 1/4 cups unbleached all-purpose flour
2 teaspoons baking soda
1/4 teaspoon salt
1 teaspoon ground cinnamon
1 teaspoon ground ginger
1/2 teaspoon cloves
12 tablespoons unsalted butter (1 1/2 sticks), at room temperature
1 cup granulated sugar
1 large egg
1/4 cup molasses
granulated sugar for dusting

Preheat the oven to 350 degrees, line your baking sheets with parchment paper and set out a plate with about half a cup of sugar on it.

Sift the flour, salt, cinnamon, ginger, coves, and bakind soda together into a bowl. In another bowl mix the butter, brown sugar and molassas together, once blended add in the egg and mix lightly until just incorperated. Add in the flour mixture and mix on a low setting, you may need to scrape the sides of the bowl or beater.

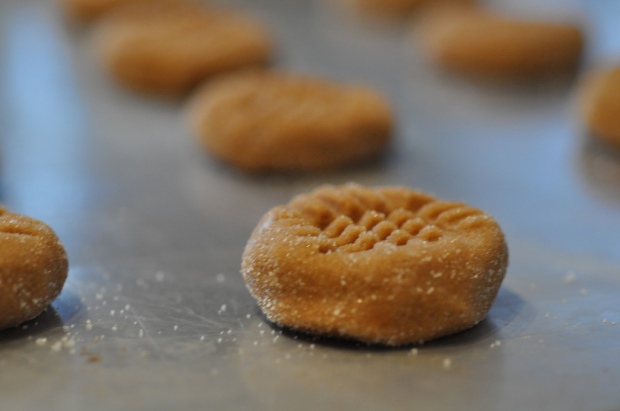
Wit the dough mixed together use a spoon to scoop a small dollop (just larger than a ping pong ball) of dough, roll it into shape in your hands and then roll it around in the sugar on a plate.  When placing the cookies, keep in mind that they will expand and keep at least 2 inches inbetween them (on a standard baking sheet I generally do 3 x 3 , although you could probably manage 3 x 4)

bake for 12-14 minutes depending on your oven. After you take them out, let them sit for about 2-3 minutes then transfer them to a cooling rack.

Truffle Gnocchi: The Weekend Edition

Now that my short little vacation is drawing to an end, I feel I should post all te delicious things I’ve been making the past few weeks. So here is my second attempt at making truffle gnocchi, they came out light and delicious, like “little pillows of heaven”

Making fresh gnocchi (and really all pasta like foods ) has been the elephant in my kitchen for a long time. So one long weekend I decided to give it a try again, and the result were fantastic. Here is my easy gnocchi recipe that can be made in one afternoon.

What you’ll need:

DSC_0277

1lb potatoes, any kind really, but I prefer yukon gold.
1.25 cups of flour
3/4 tsp kosher salt
1 tbsp truffle oil
1 egg

Tools:
Potato Ricer
Gnocchi board, or a fork

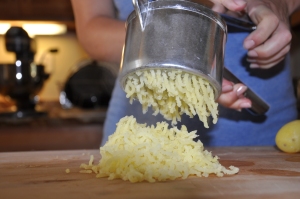
Set a pot of  water on to boil and wash your potatoes and place in boiling water (leave the skins on). When they are cooked through take them out and let them cool off a bit before removing the skins. Once the skins have been removed, rice the potatoes into a large mound
DSC_0408

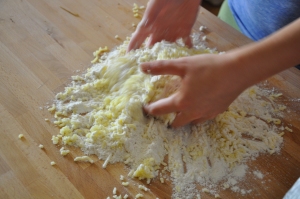
Once you’ve created the mound pour a cup of flour and the salt onto the potatoes and very gently mix together. Basically you want to put the least amount of flour into this as possible, I ended up putting just about a cup.

DSC_0436

Gently form the flour and potatoes into a bowl.

DSC_0455

Next you want to pour your whipped egg, truffle oil and salt into the flour/potato bowl.

DSC_0468

Then gently mix all the ingredients together. With gnocchi dough the less you touch it the better the end gnocchi will taste. Once the dough has been kneaded together it should be a little sticky, throw some flour down on the counter and roll out the dough to about an inch thickness and cut into 1/2 inch strips. Taking one strip at a time, ou want to roll the strip out in some flour so no side is sticky then cut the strip into 1 inch pieces. (this size can change depending on how small or big you would like your gnocchi and how think your strip is )

DSC_0489

Next to form the gnocchi you again want to be gentle with them, you want to roll each one between your hands  to even the piece out after cutting then, if you have a gnocchi board, use either your hands or a rod to roll ridges into your gnocchi. The ridges will not only make the gnocchi look better, but they also make it so more sauce sticks onto them. This is a step I sometimes will  skip to save time, but imo it’s really worth it. If you don’t have a gnocchi board you can use a fork. If you have a selection choose one with the longest and most even tines. With the fork in one hand and the gnocchi in the other slowly roll the gnocchi on the fork. It’s not the most intuitive process, but you’ll get the hang of it quickly.

DSC_0537

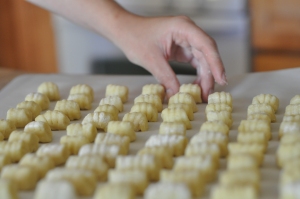
And that is all there is to it, after you roll out  your gnocchi you should place them on a cookie sheet with parchment paper on it. From this recipe I generally like to freeze half and cook half. If freezing them you will want to leave them spaced apart so they can freeze without sticking to one another, then throw them all in a bag. They will stay fresh for about 2 months.

DSC_0541

To cook your gnocchi, bring a pot of salted water to a boil and throw your gnocchi in. You will know when they are done when they float to the top of the pot. Skim them off the top and put them into your favorite sauce. These puppies do the best in a creamy sauce, but they are delicious in just about every sauce I’ve put them in.

Pizza Dough

(makes 4 medium pizzas)

1/2 c warm water, about 110 degrees
1 envelope (2 1/4 tsp) active dry yeast
2 pinches of sugar
1 1/4 c water, at room temp
2 Tbs olive oil
4 c bread flower, plus more for dusting the work surface
1 1/2 tsp salt

Dissolve sugar and yeast in the warm water. Let proff for approx. 5 – 10 minutes and then mix in the remaining water and olive oil. In the bowl of a mixer, use the paddle attatchment to mix together the flour and salt. With the dough hook, slowly add in the liquids and knead until the dough is smooth and elastic, about  5 minutes .

Place the dough in a well oiled bowled and cover with plastic wrap. let rise for 1.5 – 2 hours until doubled in size, then punch down and divide and and shape pizzas.

To save dough, leave in ball form and plae in a lightly oiled plastic bag and keep in the refridgerator for up to 3 days.